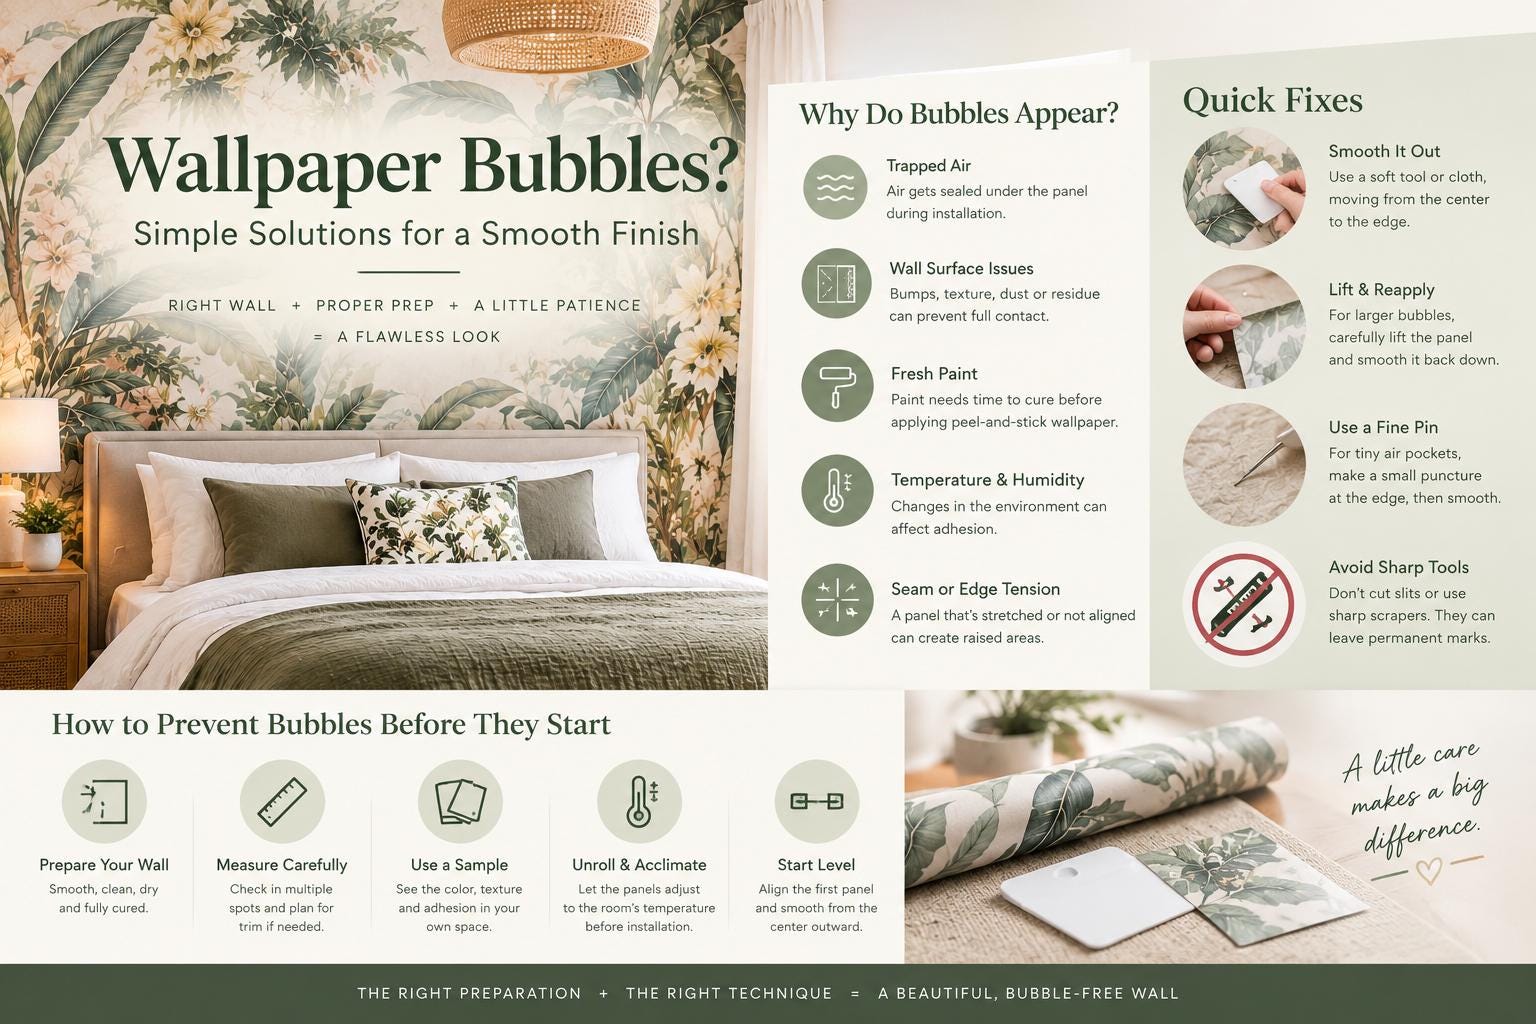
A fresh wallpaper panel should sit flat enough that the pattern, color, and texture get all the attention. When a raised spot appears, it is natural to wonder why wallpaper bubbles appear and whether the whole installation needs to come down. Usually, it does not. Most bubbles are caused by trapped air, wall-surface issues, or an installation detail that can be corrected with a little patience.For peel-and-stick wallpaper, the best result starts before the first panel touches the wall. A smooth, clean, fully cured surface gives the adhesive an even foundation and helps a dramatic botanical, tailored abstract, or personalized mural look as polished in real life as it did in your room plan.
Why Wallpaper Bubbles Appear After Installation
A bubble is a pocket of air or excess tension between the wallpaper and the wall. It can show up while you are applying a panel, immediately after finishing the wall, or a day or two later as the material settles into the room. The timing offers a useful clue about the cause.
Air was trapped during application
This is the most common reason for a small, visible bubble. When a large panel is pressed into place too quickly, air can get sealed beneath the adhesive before it has a path to escape. Starting at the top and smoothing gradually downward and outward helps move air toward the panel edges.Peel-and-stick wallpaper is forgiving when handled carefully, but it should not be pulled tight across the wall. Stretching the material to chase out a wrinkle or force a pattern match can create tension that later relaxes into a bubble. Lift and reposition the section instead of tugging it into place.
The wall was not smooth, clean, or fully dry
Wallpaper follows the surface beneath it. A tiny bump, flaking paint edge, old adhesive residue, or textured patch can prevent full contact and leave a raised area. Even walls that look smooth from across the room can have subtle texture that becomes noticeable beneath a large-scale mural or a design with a clean, solid background.Dust, cooking residue, hand oils, and cleaning-product film can also interfere with adhesion. The wall should be wiped with a mild cleaner, rinsed if needed, and allowed to dry completely before installation. Moisture is especially relevant in bathrooms, laundry areas, and rooms with recent painting or repairs.Fresh paint deserves extra attention. Although a wall may feel dry to the touch, paint can still be curing underneath. Applying self-adhesive wallpaper too soon may lead to bubbles, weak adhesion, or paint lifting when a panel is repositioned. Follow the paint manufacturer's cure-time guidance, and allow extra time in humid conditions.
Temperature and humidity changed
Wallpaper and walls respond to the environment. A chilly room, direct sun on one section of a wall, or a sudden jump in humidity can affect how the adhesive settles. This does not mean a room has to be climate-controlled, but it is smart to install in a comfortable, stable indoor environment rather than against a cold exterior wall during extreme weather.In a bathroom or other high-humidity space, ventilation matters. Peel-and-stick wallpaper is best suited to smooth, properly prepared walls that are not regularly saturated with steam or splashing water. A powder room may be a better fit than the wall directly beside a shower.
A seam or edge is under tension
Sometimes what looks like a bubble is actually tension around a seam. This can happen when one panel is slightly stretched, when the wall is not plumb, or when a pattern has been adjusted aggressively to line up. The panel may appear smooth at first, then pull very slightly as it relaxes.Custom-sized wallpaper reduces unnecessary trimming and makes planning easier, but every wall still benefits from measuring at several points. Older homes in particular can have corners, ceilings, and baseboards that are not perfectly square. Plan for a small amount of trim rather than trying to make the wallpaper compensate for an uneven wall.
How to Fix Small Bubbles in Peel-and-Stick Wallpaper
First, look closely at the bubble. If it is small and appeared during installation, it can often be smoothed out without removing the panel. Work slowly and use a soft wallpaper smoothing tool or a clean microfiber cloth, moving from the center of the bubble toward the nearest edge.If the bubble is close to the edge of a recently installed panel, gently lift only the affected portion. Reapply it gradually, using your smoothing tool in overlapping strokes to press air outward as you go. Avoid folding the wallpaper back on itself or pulling it hard. A calm reset is more effective than trying to flatten it with force.For a stubborn, pinhead-sized air pocket well inside an otherwise secure panel, a very fine pin can release the trapped air. Make the tiniest possible puncture at the outer edge of the bubble, then smooth toward that point with light pressure. This is a last-resort touch-up, not the first move for a large bubble. Test your technique in a less visible area if you are unsure.Do not cut a slit into a bubble or press on it with a sharp scraper. Both approaches can leave a permanent mark, tear the surface, or create an edge that is more noticeable than the original issue.
When lifting the panel is the better choice
A large bubble, a wrinkle with trapped air, or several bubbles across one area usually means the panel needs to be lifted and reapplied. This is most successful soon after installation, while the adhesive is still easy to reposition. Begin at the nearest top or side edge and peel back only as far as necessary.Check the wall as you work. If you find dust, a paint chip, or a rough patch beneath the material, stop and address that issue before reapplying the panel. Reinstall from the lifted edge, keeping the panel relaxed and smoothing from the center outward in small sections.If the wall paint begins to lift, do not keep pulling. The underlying paint may not have been fully cured or properly bonded to the wall. In that case, it is better to pause, repair the surface, and let it cure before attempting another installation.
Preventing Wallpaper Bubbles Before They Start
Preparation is not the glamorous part of an accent wall, but it is what lets a moody celestial print, oversized floral, or playful nursery scene look intentional from corner to corner. Give yourself enough time to prepare the room and install in daylight or bright, even lighting.Before applying wallpaper, make sure the wall is smooth, clean, dry, and sound. Sand down minor roughness, remove loose paint, and fill small holes or dents. Avoid applying peel-and-stick wallpaper over heavily textured walls, peeling paint, unprimed drywall, or surfaces with silicone, grease, or active moisture concerns. These conditions can affect both adhesion and the finished appearance.It also helps to unroll the panels in the room before installation so they can acclimate to the indoor temperature. Confirm the panel order, pattern flow, and placement around outlets, windows, or furniture. For made-to-order designs, this planning step matters because custom dimensions and personalized details are created specifically for your wall.Use a sample when you are deciding between colors, materials, or wall locations. A sample lets you see how a soft neutral reads beside your flooring, how a bold safari print looks in your child's room, and how the adhesive performs on your specific paint finish. WallpaperCraftWorks samples are especially useful when the wall has a subtle texture or gets changing natural light throughout the day.During installation, align the first panel carefully. A panel that begins level is easier to smooth and match than one that must be corrected farther down the wall. Apply it in manageable sections, pressing from the center outward rather than flattening the entire width at once. This steady pace is the simplest way to keep air moving out instead of trapping it beneath the design.
When a Bubble Signals a Bigger Surface Problem
A bubble that returns after being smoothed, appears along with peeling edges, or affects several panels may point to the wall rather than the wallpaper. Humidity, uncured paint, texture, residue, and compromised drywall can all prevent consistent adhesion. Repeatedly pressing the same spot will not solve a problem underneath the surface.For a small commercial-style office, vacation rental, or busy family space, consider how the room is used before choosing the wall. A dry accent wall away from heavy steam, direct water, and constant scuffing will offer the best long-term canvas. This is also why a smooth feature wall often works better than every wall in a challenging room.A few bubbles do not have to stand between you and a wall that feels personal, finished, and completely different from the day before. Slow application, a well-prepared surface, and a willingness to lift and reset a section when needed will give your wallpaper the smooth, design-forward finish it deserves.