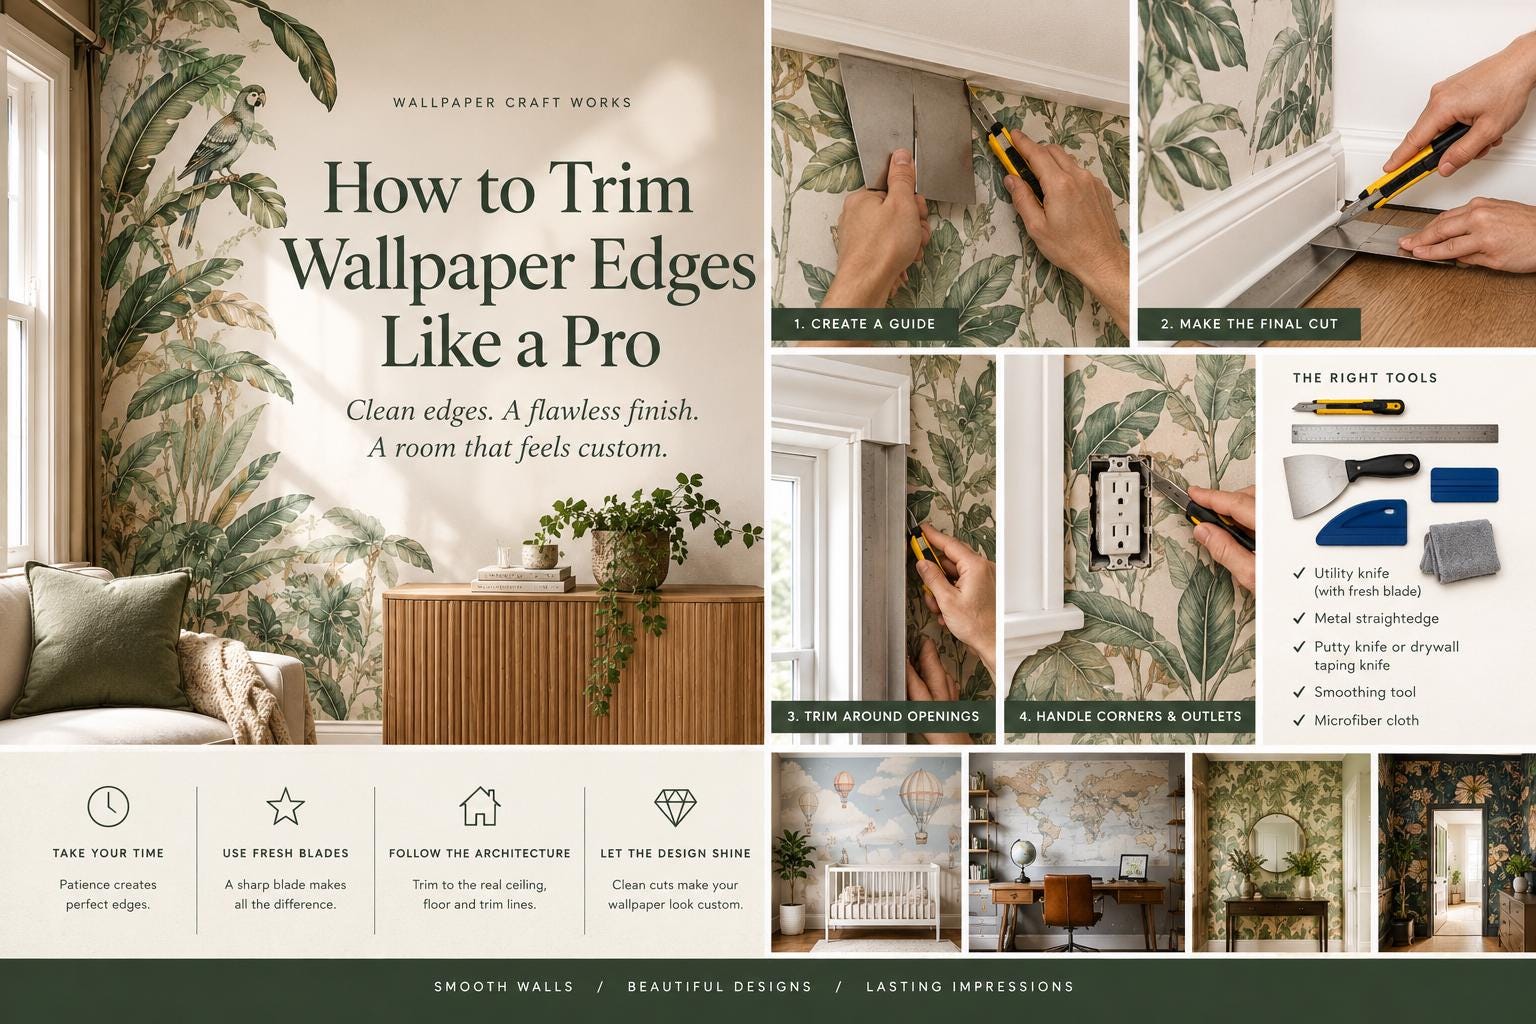
A beautiful botanical panel or personalized mural can look expertly installed until one tiny detail gives it away: a ragged edge at the baseboard, ceiling, or window trim. Learning how to trim wallpaper edges properly is what creates that crisp, built-in finish. With peel-and-stick wallpaper, the process is approachable, but it rewards patience, a sharp blade, and a steady hand.The goal is not to cut faster. It is to make one clean, intentional cut while the wallpaper is fully supported against the wall. That keeps the design looking polished in a nursery, home office, rental refresh, or statement-making entryway.
What You Need Before You Trim Wallpaper Edges
Set up your cutting tools before installing the final section of a panel. Pausing to hunt for a dull utility knife while holding material near a corner is when slips and uneven cuts happen.Use a sharp snap-off utility knife or craft knife with replaceable blades, a wide wallpaper smoothing tool, and a metal straightedge. A metal putty knife or drywall taping knife also works well around baseboards, ceilings, and trim because its broad, firm edge protects the wall and gives the blade a clean cutting line. Keep a microfiber cloth nearby to wipe away dust or adhesive residue from the blade.The most overlooked tool is a fresh blade. Peel-and-stick material can be cut cleanly, but a blade that has already made several long cuts may drag, snag, or leave a fuzzy-looking edge. Snap off the blade segment or replace the blade often, especially after trimming textured areas, several panels, or a large wall mural.Avoid using scissors for installed wallpaper edges. They are useful for rough-trimming excess material before placement, but they cannot create the same flush result once the wallpaper is on the wall.
The Best Time to Make the Final Cut
Leave a small amount of excess wallpaper at the top, bottom, and sides of each panel. About 1 to 2 inches is usually enough. This extra material gives you room to align the pattern and account for ceilings, floors, and molding that are not perfectly level.Do not trim the edge before the panel is fully positioned and smoothed. First, apply the wallpaper from top to bottom, working from the center outward with your smoothing tool. Press out trapped air as you go, but do not stretch the material to force it into place. Stretching can distort a floral repeat, misalign a geometric pattern, or cause the edge to pull back later.Once the panel is flat and its pattern is aligned with the adjoining panel, press the excess firmly into the ceiling line, baseboard, or trim. This creates a visible crease that guides your straightedge. On peel-and-stick wallpaper, a clean crease is your best friend: it marks the exact point where the wall ends without asking you to guess.
How to Trim Wallpaper Edges at Ceilings and Baseboards
Start at the top of the panel if you have excess at both the ceiling and the baseboard. Hold the metal straightedge or wide putty knife tightly in the crease where the ceiling meets the wall. The tool should sit flat against the wallpaper, not at an angle.With your other hand, guide the utility knife along the edge of the straightedge in one controlled motion. Use light, consistent pressure. Trying to slice through the wallpaper and score the drywall underneath in one aggressive pass is a common mistake. The blade should cut the wallpaper, not dig into the wall.Move the straightedge a few inches at a time, overlapping each previous cut slightly so no tiny tabs remain. Keep pressure on the tool as you cut. If it shifts, stop and reset rather than attempting to correct the line mid-cut.At the baseboard, use the same approach. Push the wallpaper firmly into the narrow angle between the wall and the molding, then hold the straightedge in place and trim. If a thick or decorative baseboard makes it difficult to keep the tool flat, use a narrower metal putty knife and make shorter cuts. Precision matters more than speed.Pull away the trimmed strip slowly. If it resists, do not tug. Run the blade gently along the cut again, using a fresh segment if needed. Tugging can lift the installed wallpaper or create a tear that travels into the visible design.
A note on uneven ceilings and floors
Many homes have subtle dips, slopes, and corners that are not square. Trim to the actual ceiling or baseboard line rather than relying on a level line across the room. The eye reads the wallpaper in relation to the architecture around it. A perfectly level cut that leaves an uneven visible gap at the ceiling will look less finished than a cut that follows the room.
Trimming Around Windows, Doors, and Outlet Covers
Windows and doors need the same principle: secure the wallpaper first, then cut against a firm guide. Apply the panel over the opening and smooth it toward the trim. For a window or door opening, make a small relief cut toward each corner if needed. This allows the material to lie flat without bunching.Press the wallpaper into the edge of the casing, place your metal straightedge against the trim, and cut in short sections. Do not cut freehand along the molding. Even a steady hand can wander, and a straightedge makes the finished edge look intentional.For outlet and switch covers, turn off power at the breaker before removing the cover plate. Apply and smooth the wallpaper over the opening, then use the outline of the electrical box as your guide. Make a small X-shaped cut in the center first, fold the sections inward, and trim carefully around the box edge. Reinstall the cover plate after the wallpaper is secure. The plate will conceal the small cut edge, so there is no need to make the opening larger than necessary.
Corners Need a Different Approach
Inside corners can look simple, but they are rarely straight. Rather than wrapping a full panel tightly around an inside corner and hoping the next wall cooperates, trim the first panel with a slight wrap of about 1/8 inch onto the adjacent wall. Then install the next panel over that small wrap, aligning the design as closely as the pattern allows.This overlap is often more forgiving than a butt seam in a corner, particularly in older homes where the corner bows or changes angle from top to bottom. Smooth the overlap firmly, then trim any excess at the ceiling and baseboard. With a bold abstract, safari, or celestial design, the visual movement of the pattern can make a carefully placed corner seam especially discreet.Outside corners need extra adhesion and a gentler touch. Smooth the material around the corner gradually without pulling it tight. Use your smoothing tool to define the corner, then trim only after the wallpaper is resting naturally against both walls. If the surface is rough, dusty, or damaged, peel-and-stick wallpaper may not adhere reliably enough for a clean corner finish. Smooth, clean, dry painted walls are the best foundation.
Fixing a Less-Than-Perfect Cut
A tiny uneven spot does not mean the entire panel needs replacing. First, step back. Small variations are often invisible from normal viewing distance, especially near a baseboard or behind furniture. If a narrow flap remains, hold a straightedge against the edge and shave it off with a new blade.If the wallpaper lifted slightly while trimming, press it back down with your smoothing tool and warm it gently with the heat of your hand. Do not add glue or tape to a peel-and-stick panel unless the product instructions specifically call for it. Added adhesives can damage paint and make future removal more difficult.A cut that is visibly short is harder to disguise, which is why leaving enough excess during installation matters. In a high-visibility location, such as beside a door frame or at eye level on an accent wall, replacing the panel may give the best visual result. Ordering a sample before committing to a made-to-order design can help you assess material feel, color, and adhesion on your own wall surface.
Clean Edges Make the Design Feel Custom
The difference between a DIY wallpaper project that feels temporary and one that feels tailored is often found at the perimeter. Fresh blades, firm straightedges, and deliberate cuts let the wallpaper meet the architecture of the room cleanly, so the design gets the attention instead of the installation.Take your time at the final edges. That extra care is what lets a dramatic mural, soft nursery print, or sophisticated patterned wall look like it was made for the space.