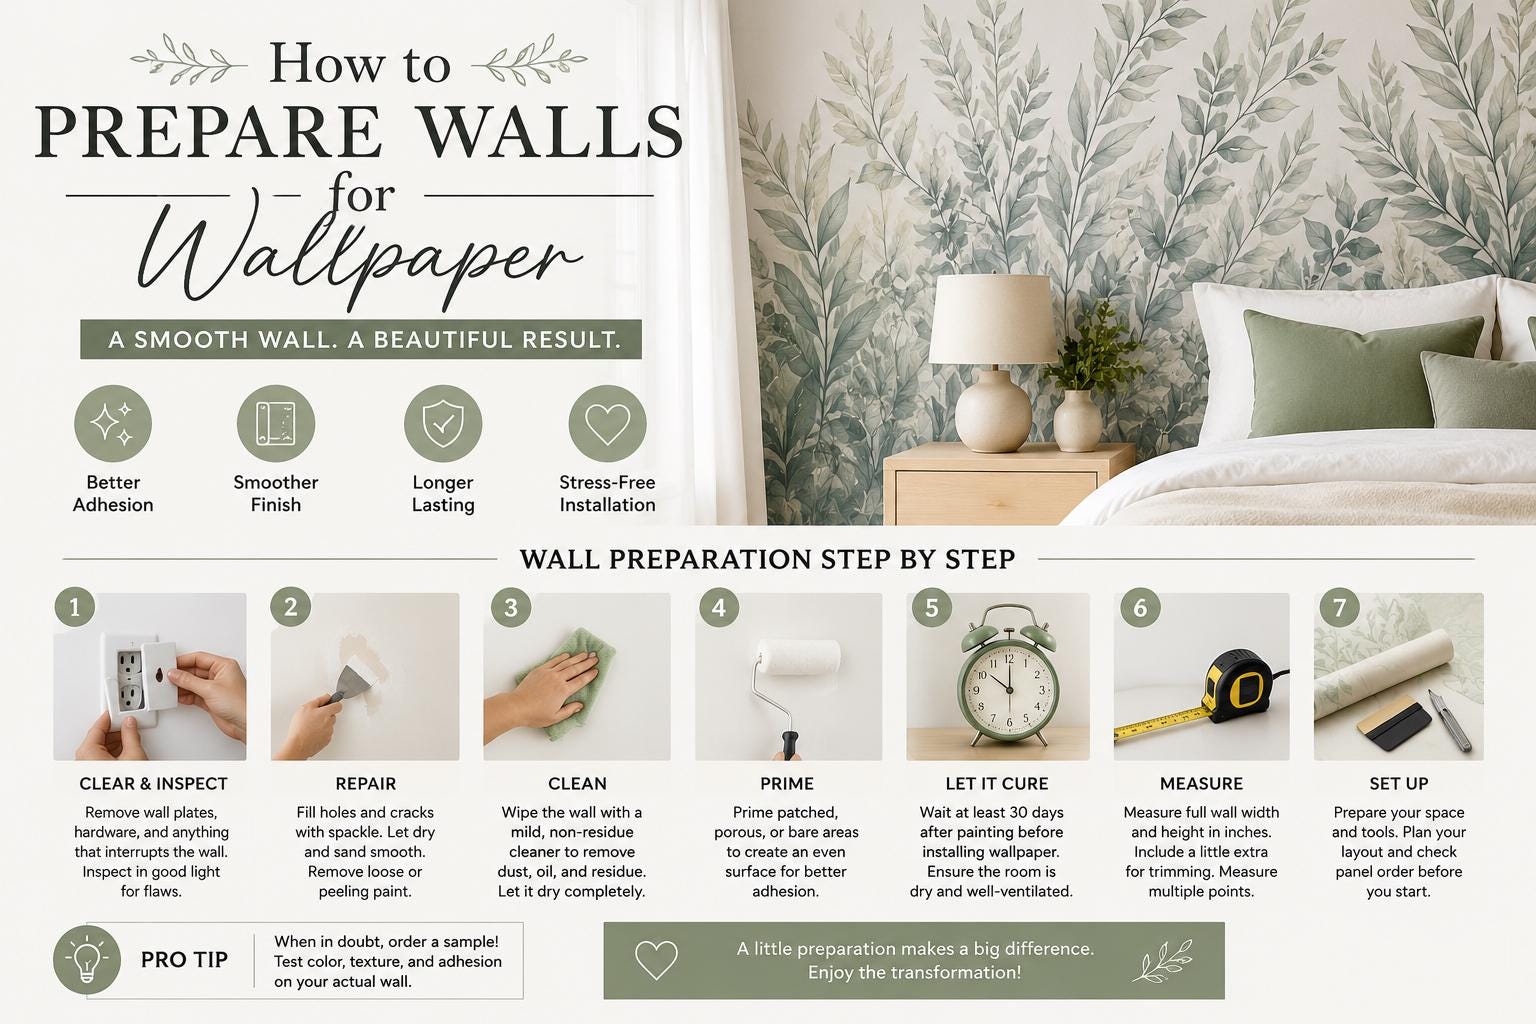
A dramatic botanical bedroom, a personalized nursery mural, or a polished home office accent wall starts before the first panel goes up. To prepare walls for wallpaper properly, focus on the surface beneath the design: it needs to be clean, dry, smooth, and fully cured. That bit of prep protects the crisp finish you want from peel-and-stick wallpaper and makes installation much less stressful.For most rooms, this is a manageable DIY project. The key is not rushing past small flaws that can show through a light-colored print, interrupt a mural seam, or affect adhesion over time.
What a Peel-and-Stick Wallpaper Wall Needs
Peel-and-stick wallpaper is designed for smooth, properly prepared interior walls. A clean painted wall with a low-sheen finish is usually the best canvas for a made-to-order design. Smooth drywall, primed walls, and previously painted surfaces can all work well when they are sound and dry.Surface condition matters more than the wall's color. A dark paint color generally will not affect an opaque wallpaper, but deep grooves, flaking paint, peeling patches, dust, or an orange-peel texture can affect how the finished wall looks and how securely the adhesive sits.Textured walls deserve an honest assessment. Very light texture may be acceptable with some designs, especially those with visual movement or darker colors. Heavy orange peel, knockdown texture, sand-textured paint, brick, raw wood, and uneven plaster are not ideal for peel-and-stick material. The wallpaper follows the contours beneath it, so texture can remain visible and may reduce contact between the adhesive and the wall.If you are uncertain about your wall finish, order a sample first. It gives you a chance to see the print color and material in your room's lighting while testing adhesion on the actual surface.
How to Prepare Walls for Wallpaper Step by Step
Clear the wall and inspect it in daylight
Remove artwork, outlet covers, switch plates, hooks, nails, and anything else that interrupts the wall. Keep hardware and cover plates together so reassembly is easy after installation. If the wallpaper will meet a baseboard, ceiling line, built-in shelving, or a door frame, inspect those edges too. A clean edge makes measuring and trimming more accurate.Use natural light or a bright lamp held at an angle to inspect the wall. This reveals dents, raised paint edges, old adhesive, hairline cracks, and bumps that can disappear under ordinary room lighting. Run your hand over the surface as well. If it does not feel smooth, it may show through a sleek geometric print or a pale, open-background mural.
Repair chips, holes, and uneven areas
Fill nail holes, small dents, and minor cracks with a lightweight spackling compound. Let it dry completely, then sand it lightly until the repair is level with the surrounding paint. Wipe away all sanding dust with a dry microfiber cloth before moving on.For peeling paint, scrape only the loose material, feather the edge with fine-grit sandpaper, and patch as needed. Do not apply wallpaper over paint that is lifting or bubbling. The adhesive may hold to the loose paint rather than the wall itself, creating a weak point later.Larger drywall damage, moisture stains, or active cracks call for a more careful repair before wallpapering. Moisture issues should always be solved at the source first. A beautiful mural cannot compensate for a wall that is damp, soft, or still changing underneath.
Clean off dust, oil, and residue
Even a wall that looks clean can carry a thin layer of household dust, cooking residue, hairspray, or hand oils around switches and doorways. Those residues can interfere with self-adhesive wallpaper, particularly at panel edges.Wipe the wall with a soft cloth and a mild, non-residue cleaner. Avoid oily cleaning sprays, polish products, and strong chemicals that can leave a film or damage paint. Follow with a separate cloth dampened with clean water if your cleaner requires rinsing, then allow the wall to dry completely.Pay special attention to kitchens, entryways, children's rooms, and home offices, where walls are often touched more frequently. A quick, thoughtful cleaning pass is one of the simplest ways to support a smooth installation.
Prime repaired or porous areas
Fresh spackle, bare drywall, and heavily sanded repairs are porous. They can absorb moisture differently than the surrounding wall and create an uneven surface beneath wallpaper. Spot-prime these areas after sanding so the finish is sealed and consistent.If you are working with new drywall or an entire wall that has been patched extensively, a full coat of quality primer is a smart choice. Choose a wall-appropriate primer and let it cure according to the manufacturer's directions. Primer improves uniformity, but it is not a shortcut for repairing texture or loose paint.Walls painted with flat or matte paint can sometimes be more prone to surface dusting or less reliable adhesion than smoother finishes. Whether you need to repaint depends on the specific wall condition. If the paint is sound, smooth, and clean, a sample test may be all you need. If it feels chalky, scuffs easily, or sheds when wiped, repainting with a smooth, durable interior finish can create a more dependable base.
Give fresh paint enough time to cure
This is where patience pays off. A wall can feel dry within hours, but paint needs longer to fully cure. Applying peel-and-stick wallpaper too soon after painting can affect adhesion and may make removal less predictable.Wait at least 30 days after painting before installing, unless your paint manufacturer gives a longer cure-time recommendation. Ventilate the room well and avoid wallpapering in a damp, unusually cold, or humid space. A stable room temperature and dry surface make application easier.
Measure Before You Order
Wall preparation also includes accurate measuring. Since made-to-order wallpaper is produced to fit your selected dimensions, measure the full width and height of the wall in inches, not just the open area between trim or furniture. Measure in more than one place if ceilings or floors are not perfectly level, then use the largest measurement.Include a little extra material for trimming at the top, bottom, and sides. That allowance is especially helpful in older homes, where ceilings and corners often vary more than expected. For a feature wall behind a bed, desk, crib, or console, measure the entire wall if you want the design to read as one intentional backdrop.Do not subtract windows, doors, or outlets unless your ordering instructions specifically tell you to do so. It is typically easier to apply a continuous panel and trim around obstacles during installation than to work around a cutout that is off by even a fraction of an inch.For personalized murals, double-check every spelling detail, name, date, city, or initial before placing the order. Also confirm the orientation of the wall and the placement of any major design elements. Made-to-order decor gives you a more tailored result, so careful measurements and proof details matter.
Set Up the Room for an Easier Install
A prepared wall is only half the job. Create enough open floor space to unroll and identify panels without creasing them. Move furniture away from the wall, protect floors if needed, and keep a step stool, measuring tape, level, pencil, smoothing tool, sharp utility knife, and clean cloth nearby.Avoid installing directly over outlet covers or switch plates. Remove the plates, apply the wallpaper across the opening, and carefully trim the material once it is secure. Turn off power at the breaker if you are working close to exposed electrical boxes.Before peeling the backing, arrange panels in order and check the pattern alignment. Most installation frustration comes from starting slightly off-level or mixing up panel sequence, not from the adhesive itself. A light vertical guide line near the starting edge gives your first panel a reliable reference point.
When a Sample Is Worth the Extra Step
Samples are especially useful when your wall has a light texture, dark paint, recent repairs, or a paint finish you cannot identify. Apply the sample to a cleaned, inconspicuous area and leave it in place long enough to observe how it holds. Look at it in morning, afternoon, and evening light, particularly for designs with soft neutrals, muted florals, or detailed mural artwork.A sample cannot duplicate every condition across a large wall, but it can answer the questions that matter before ordering: Does the color suit the room? Does the material sit smoothly? Does your paint surface support adhesion? For renters and anyone creating a high-visibility accent wall, that extra confidence is often worth it.A smooth, dry, thoughtfully measured wall lets the pattern do what you chose it to do: make a room feel more personal, polished, and distinctly yours. Take the prep seriously, then enjoy the satisfying part - watching an ordinary wall become the focal point of the room.