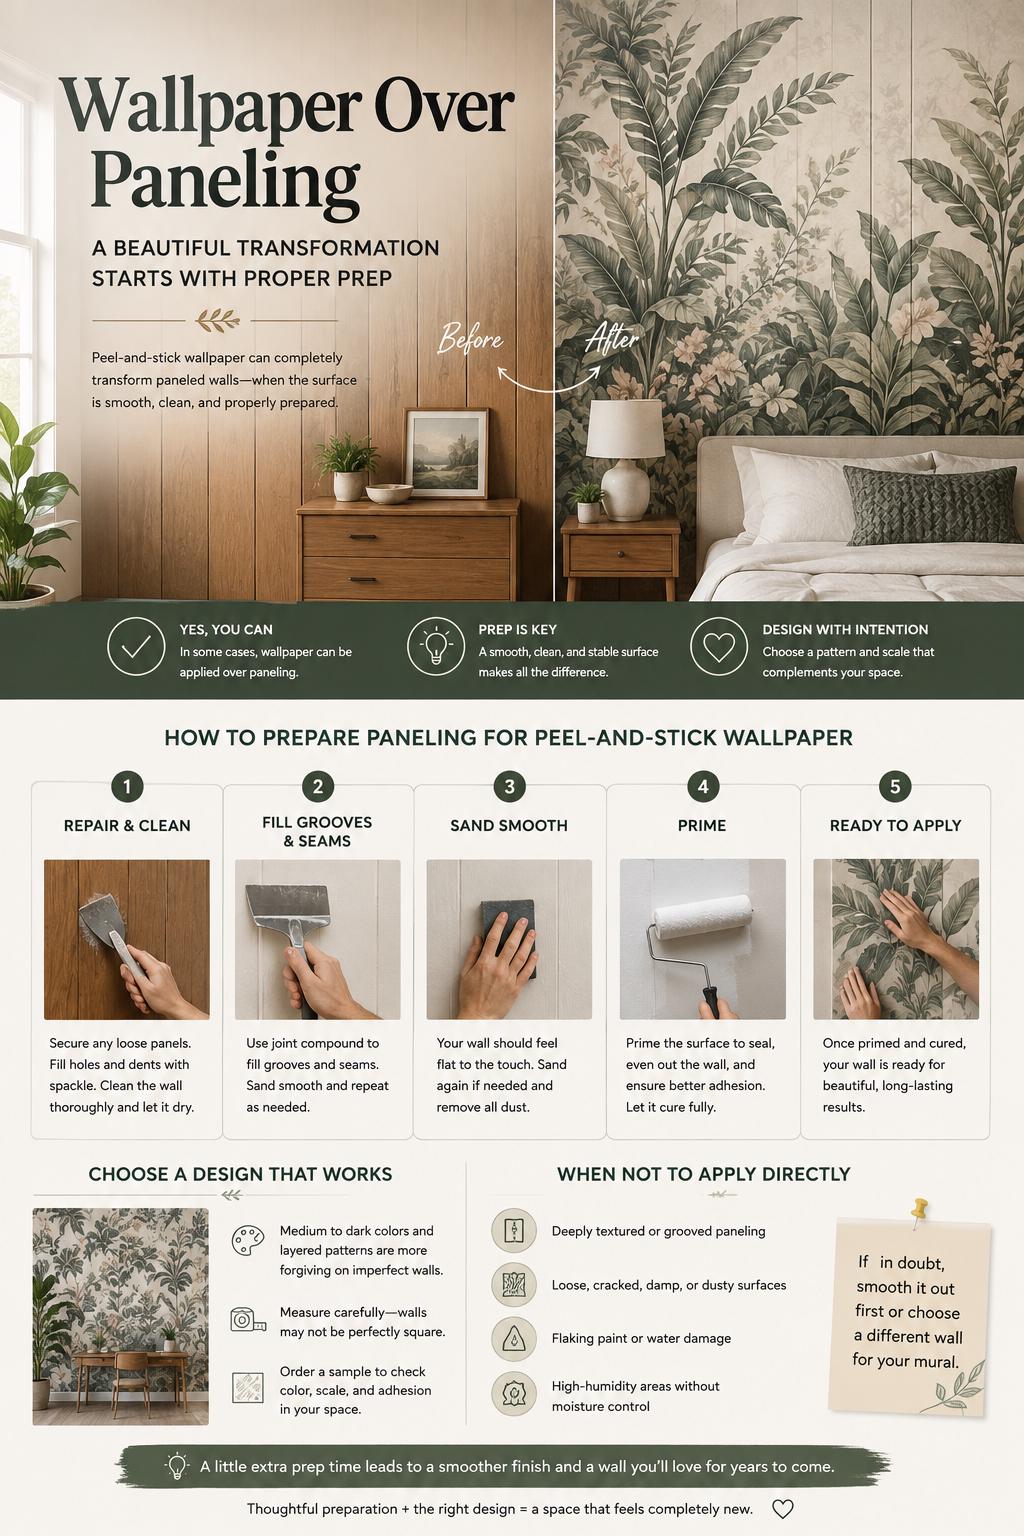
Wood paneling can make a room feel dated, dark, or unexpectedly busy, especially when every seam catches the light. Wallpaper over paneling can create a dramatic change without removing the wall material, but the finish depends far more on preparation than on the pattern you choose. Peel-and-stick wallpaper is designed for smooth, clean walls, so paneling needs an honest assessment before you order.A moody botanical print, a calm neutral mural, or a personalized design can absolutely shift the feeling of a paneled bedroom, entryway, office, or rental refresh. The key is deciding whether the paneling can become a smooth backdrop or whether its grooves, texture, and movement will show through your new wallcovering.
Can You Put Wallpaper Over Paneling?
Yes, in some cases. Flat paneling that has been painted, is firmly attached, and has only shallow seams can often be prepared for wallpaper. Deeply grooved faux wood paneling, rough-textured boards, loose sections, or panels with visible expansion gaps need more work and may not be a good direct surface for peel-and-stick material.The pattern will not hide every wall issue. In fact, a smooth mural, a light-colored design, or a pattern with broad open areas can make vertical grooves more noticeable once the room is lit. Even a dense floral or abstract print may bridge shallow seams at first, then reveal them over time as the adhesive settles into the wall's contours.This is where expectations matter. Peel-and-stick wallpaper offers a more accessible alternative to pasted wallpaper and can be removed more easily than permanent wall treatments, but it is not a thickness-building product. It follows the surface beneath it.
Start With the Type of Paneling You Have
Look at the wall from the side, with a lamp or flashlight aimed across it. This makes grooves, raised grain, nail holes, and uneven joints much easier to see. Then press gently along the panels. If anything shifts, lifts, or flexes, repair it before considering wallpaper.Thin decorative paneling with narrow, shallow vertical lines is usually the most realistic candidate for prep and coverage. Painted MDF paneling or flat sheets with small seams can also work well once those seams are filled and sanded smooth.Tongue-and-groove boards, beadboard, and deeply embossed wood-grain paneling are different. Their character comes from visible relief, and that relief will likely telegraph through wallpaper. You can cover these walls, but only after creating a smooth surface over them. If you love the paneling's texture, consider wallpapering a different accent wall instead.Real wood deserves an extra pause. Vintage wood paneling can be beautiful, valuable, or difficult to restore once it has been heavily filled and painted. In that situation, a removable design may still sound appealing, but direct application is not always the best choice. A framed mural, a large-scale art arrangement, or a freestanding decorative moment may protect the original material better.
How to Prepare Paneling for Peel-and-Stick Wallpaper
The goal is simple: create a dry, stable, clean, and smooth surface. Skipping any one of those steps can lead to visible seams, weak adhesion, or an uneven finished look.
Repair, clean, and degloss the wall
Secure loose panels and set any proud nails or screws slightly below the surface. Fill holes, dents, and small gaps with a paintable patching compound. Wipe away dust, grease, and residue with a gentle cleaner, then allow the wall to dry completely.High-gloss paint can make adhesive performance less predictable. Lightly sanding the sheen gives primer a better surface to grip. You do not need to sand aggressively, but you do need to remove the slick finish and vacuum all sanding dust afterward.
Fill grooves and seams until they disappear
For shallow panel grooves, apply joint compound or a quality spackle with a wide taping knife. Pull it across the grooves rather than pressing it into one line at a time, which helps create a flatter plane. Let it dry according to the product directions, sand it smooth, and repeat as needed.Run your hand across the wall after sanding. Your fingers are often more accurate than your eyes. If you can feel a dip or ridge, wallpaper can reveal it, especially near a window or overhead light.For deeper grooves, skim-coating the full wall is often more effective than filling each channel individually. This is more involved, and it may be worth hiring a drywall finisher if you want a flawlessly smooth mural wall. Another option is installing a smooth wall liner or thin, paint-ready hardboard over the paneling, provided it is securely mounted and its own seams are finished properly.
Prime and let the surface cure
Prime after the wall is smooth and dust-free. A quality primer helps seal porous compound, creates a more uniform color, and gives the adhesive a consistent surface. Choose a primer appropriate for your wall and follow its full drying and curing instructions.Fresh paint and primer can feel dry long before they are cured. Applying peel-and-stick wallpaper too soon can lead to adhesion problems or paint damage during removal. Plan this part of the project with patience, not just the installation day in mind.
When Direct Application Is Not a Good Bet
Sometimes the most design-forward decision is to choose a different wall or prepare the existing one more thoroughly. Do not apply peel-and-stick wallpaper directly to paneling that is deeply textured, dusty, damp, cracked, or actively separating from the wall. Avoid walls with flaking paint, water damage, or an oily finish as well.Bathrooms, laundry rooms, and other high-humidity spaces require additional care. Humidity can challenge adhesive edges, particularly where paneling seams create tiny air channels. If the room has recurring moisture issues, solve those first rather than expecting a wallcovering to disguise them.Rental homes add another trade-off. Peel-and-stick material can be a practical choice on a well-painted, smooth wall, but extensive skim-coating, sanding, and priming may not be renter-friendly. Ask for permission before altering paneling, and remember that removability does not guarantee zero paint lift on every wall. Paint condition, prior repairs, and the original surface all matter.
Choose a Design With the Finished Wall in Mind
Once your paneling is properly smoothed, you can choose based on the mood you want rather than trying to camouflage a problem. A large-scale floral can soften a traditional living room. A serene celestial print can give a home office more personality without adding visual clutter. Safari, storybook, and personalized name designs can make a child's room feel considered from the start.If the wall still has slight visual variation, medium-to-dark colors and layered patterns tend to be more forgiving than pale solids or minimalist murals. That said, pattern is not a substitute for prep. A beautiful design deserves a surface that lets it look intentional.Measure each wall at its widest and tallest points, including any areas above doors, around windows, or beside built-ins that you plan to cover. Paneling is often found in older rooms where walls are not perfectly square, so measure more than once. Custom sizing helps reduce awkward cut lines and unnecessary seams, but accurate dimensions are still essential.Before committing to a made-to-order wallcovering, order a sample when possible. View it in the actual room during morning, afternoon, and evening light. A sample also lets you assess color, material feel, and adhesion on your prepared surface. WallpaperCraftWorks designs are made to order, so confirming your wall condition and dimensions before placing a full order is especially worthwhile.
Install Slowly for a More Polished Result
After the wall has been prepared and cured, installation is straightforward but should not be rushed. Start from a true vertical line rather than assuming the edge of the paneling or a corner is perfectly straight. Older paneled rooms often prove otherwise.Apply the first panel gradually, smoothing from the center outward as you go. Do not stretch the material to force it into place. Stretching can distort the design and create tension that shows up later at the edges. Work around outlets and trim carefully, leaving final cuts until the panel is secure and smooth.If an edge begins to lift, stop and check the cause. It may be dust, an unprimed patch, residual texture, or a wall that has not fully cured. Pressing harder rarely solves a surface-prep issue.A paneled wall does not have to dictate the personality of a room. Give it the smooth foundation a peel-and-stick design needs, choose a scale and color story that feels like you, and the wall can become the detail everyone notices for the right reason.