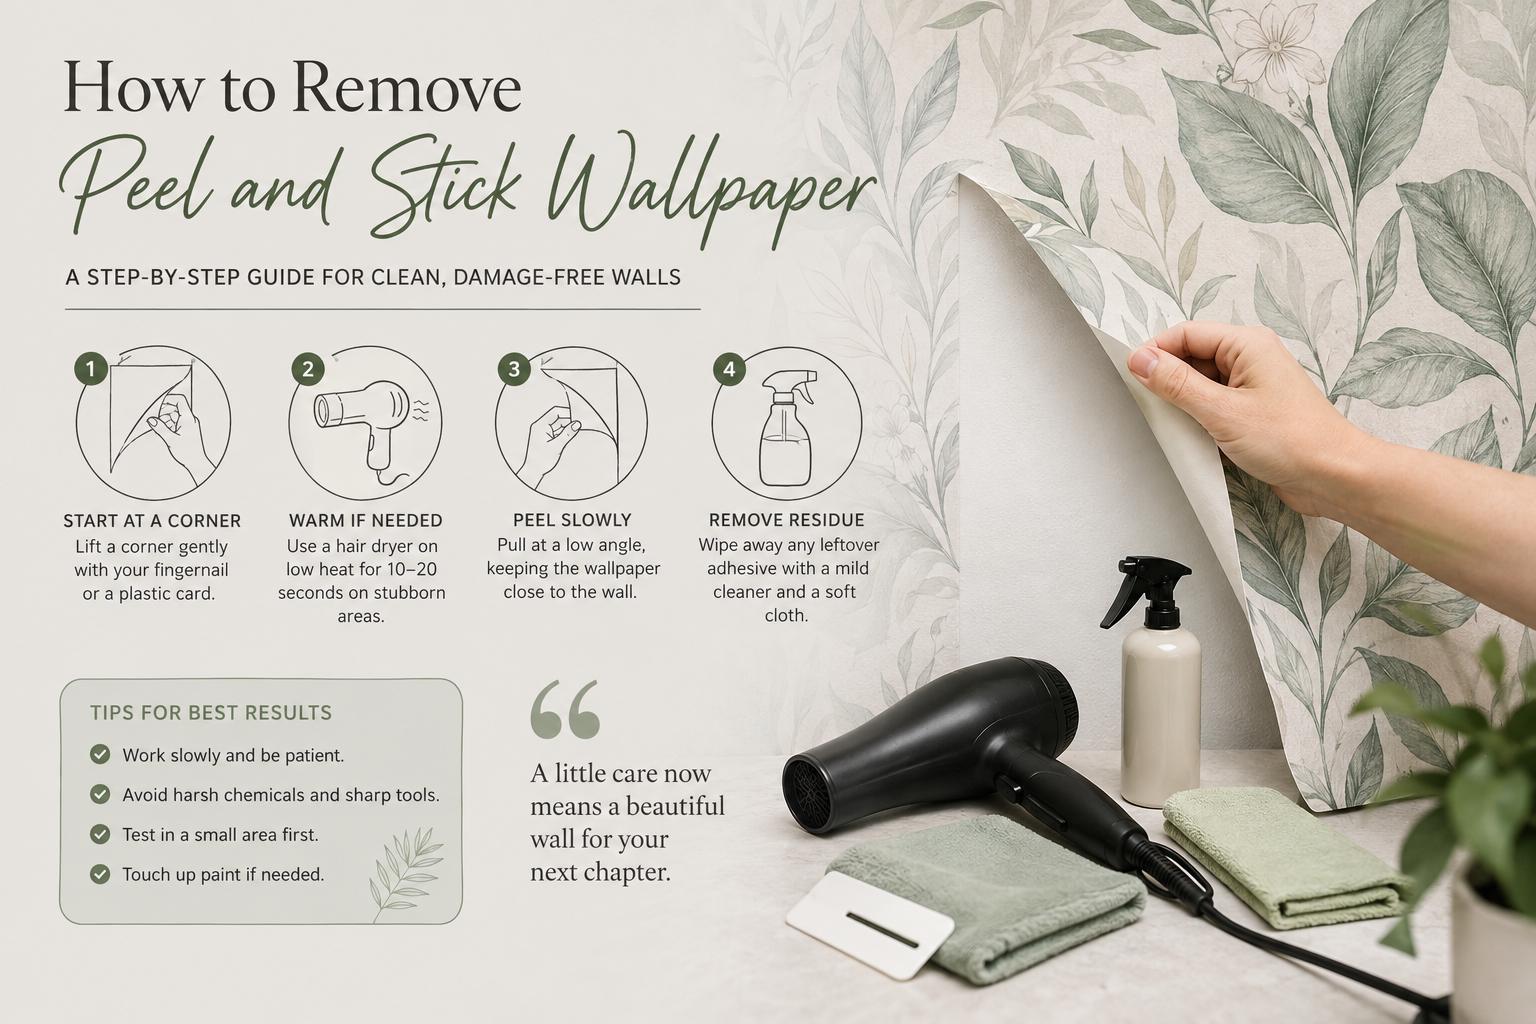
A dramatic botanical wall, a nursery mural, or a personalized home-office backdrop can change the whole feeling of a room. But styles change, leases end, and sometimes a wall needs a fresh start. Knowing how to remove peel and stick wallpaper correctly helps you make that change with the least possible disruption to the paint and drywall underneath.The good news is that quality self-adhesive wallpaper is designed to lift without the paste-soaking process of traditional wallpaper. The less-good news is that every wall has its own history. Fresh paint, aging drywall, textured surfaces, weak paint adhesion, and prior wall repairs can all affect the result. Work slowly, use gentle heat only when needed, and let the material tell you when it is ready to release.
Before You Remove Peel and Stick Wallpaper
Start by looking closely at the wall and choosing a small, inconspicuous spot, such as the upper corner behind a door or piece of furniture. If the wallpaper was installed on a smooth, clean, properly painted wall with cured paint, it will often peel away in broad sections. If paint begins lifting with the material, stop rather than pulling harder.Peel-and-stick wallpaper is generally best suited to smooth walls, and removal is most predictable from that same type of surface. Walls with flaking paint, unprimed drywall, damaged skim coat, heavy texture, or paint that was not fully cured before installation carry more risk. That does not mean the wallpaper cannot come down, but it does mean a patient approach matters more than speed.Clear nearby furniture, remove outlet covers if you are comfortable doing so, and place a drop cloth along the baseboard. You will not usually need a bucket of water or harsh chemical stripper. Keep a hair dryer, a plastic scraper or old gift card, a clean microfiber cloth, and a mild adhesive remover nearby for any stubborn spots.
How to Remove Peel and Stick Wallpaper Step by Step
Start at a top corner or seam
Use a fingernail or the edge of a plastic card to gently lift one corner. Avoid metal putty knives, utility blades, or anything sharp enough to score the wall. Once you have a small flap, grip the wallpaper close to the wall rather than pulling it straight out into the room.Pull at a low, steady angle, moving downward or sideways depending on the panel layout. Think of peeling a label from a glass jar: a slow, close pull gives you more control than a quick tug. If the panel comes away easily, continue with consistent pressure and keep the material supported as you go.
Warm resistant areas lightly
If a corner will not lift or the wallpaper feels unusually firm, use a hair dryer on low or medium heat. Hold it several inches from the surface and warm a small area for 10 to 20 seconds. The goal is to soften the adhesive slightly, not to overheat the wallpaper or the paint beneath it.After warming the area, try peeling again. Move the dryer ahead of your pulling hand as needed, working in short sections. Heat can be especially helpful around seams, corners, and areas that received extra pressure during installation.Do not use a heat gun unless you have experience with one. High heat can blister paint, soften caulk, warp plastic outlet covers, or damage the wall surface. A standard hair dryer offers a much safer level of control for most residential projects.
Work one panel at a time
For a full accent wall or mural, remove each panel separately instead of trying to strip the entire wall in one oversized sheet. Large panels can become unwieldy, particularly when they are custom-sized for a tall wall. Folding the removed portion loosely as you go keeps it from sticking back onto the wall or grabbing nearby furniture.If a panel tears, do not panic. Lift a new edge with your plastic card, then continue slowly. A tear is usually a sign to use less pulling force, adjust your angle, or add a little gentle warmth.
Take extra care around edges and fixtures
Peel slowly around light switches, outlets, window trim, baseboards, shelving, and door frames. These are the places where wallpaper may be tightly pressed into a narrow edge or tucked beneath a trim line. If you meet resistance, warm the area and use the plastic card to guide the material free.For removable decals or smaller personalized designs, the same approach applies. Begin at a corner, peel low and slow, and use light heat only if necessary. Smaller pieces often release quickly, but intricate shapes benefit from patience.
What to Do If Adhesive Is Left Behind
A well-prepped, smooth wall may be left almost clean after the wallpaper comes down. Still, small tacky areas can happen, especially near seams or in spots exposed to warmth and sunlight.First, try rubbing the residue gently with a clean microfiber cloth. If that does not work, test a small hidden area with a mild adhesive remover that is labeled safe for painted surfaces. Apply it to the cloth, not directly to the wall, and use a minimal amount. Wipe the spot, then follow with a damp cloth and dry the area.Avoid soaking the wall with water, using abrasive scrubbers, or reaching for strong solvents without testing. Those shortcuts can dull paint, leave shiny patches, or soften the drywall paper beneath a thin paint layer. When residue is limited, slow and gentle cleaning is usually faster than repairing a damaged wall later.
If Paint Starts Peeling With the Wallpaper
Stop immediately if paint, drywall paper, or joint compound begins to lift. This is usually a wall-prep issue rather than a failure of the wallpaper itself. Paint that was already poorly bonded, walls that were painted too recently, and repaired areas without proper primer are common causes.Try warming the section lightly and pull at an even lower angle. Sometimes that is enough to separate the adhesive from the paint. If the paint still lifts, remove the wallpaper in very small sections and accept that a touch-up may be the most practical outcome.For larger areas of damage, let the wall dry, sand any rough edges lightly, apply primer where drywall paper is exposed, and repaint as needed. This is one reason it is wise to keep a little leftover wall paint after a decorating project. A small touch-up is much easier to blend when you have the original color and finish.
Removing Wallpaper in Rentals and Recently Painted Rooms
Renters should review their lease and photograph the wall before removal, particularly if the wallpaper was installed in a highly visible room. Peel-and-stick wallpaper is a flexible decor choice, but no wallcovering can guarantee a perfect outcome on every painted surface. Older apartments and quick-turn rental paint jobs may have weak layers that lift more easily.In a recently painted room, timing matters. Paint needs time to cure fully, which is longer than simply feeling dry to the touch. If wallpaper was applied too soon after painting, removal can be more likely to disturb the finish. When in doubt, plan for a careful removal day and keep touch-up paint available.For future projects, order a sample before committing to a full wall. It gives you a chance to see the color and material in your room, assess your wall’s smoothness, and test adhesion in a discreet area. That small step is especially useful for feature walls in rentals, nurseries, and spaces where the existing paint condition is uncertain.
After the Wall Is Clear
Once the wallpaper and any residue are gone, inspect the surface in daylight. Wipe it with a dry cloth, touch up any minor paint marks, and give the wall time to air out before adding a new design. If you plan to install another peel-and-stick wallpaper, make sure the wall is smooth, clean, dry, and free from dust or cleaner residue.A wall does not need a permanent renovation to feel personal. Whether you are preparing for a move, changing a child’s room as they grow, or trading a moody abstract for a fresh floral print, careful removal keeps the next design decision feeling easy.