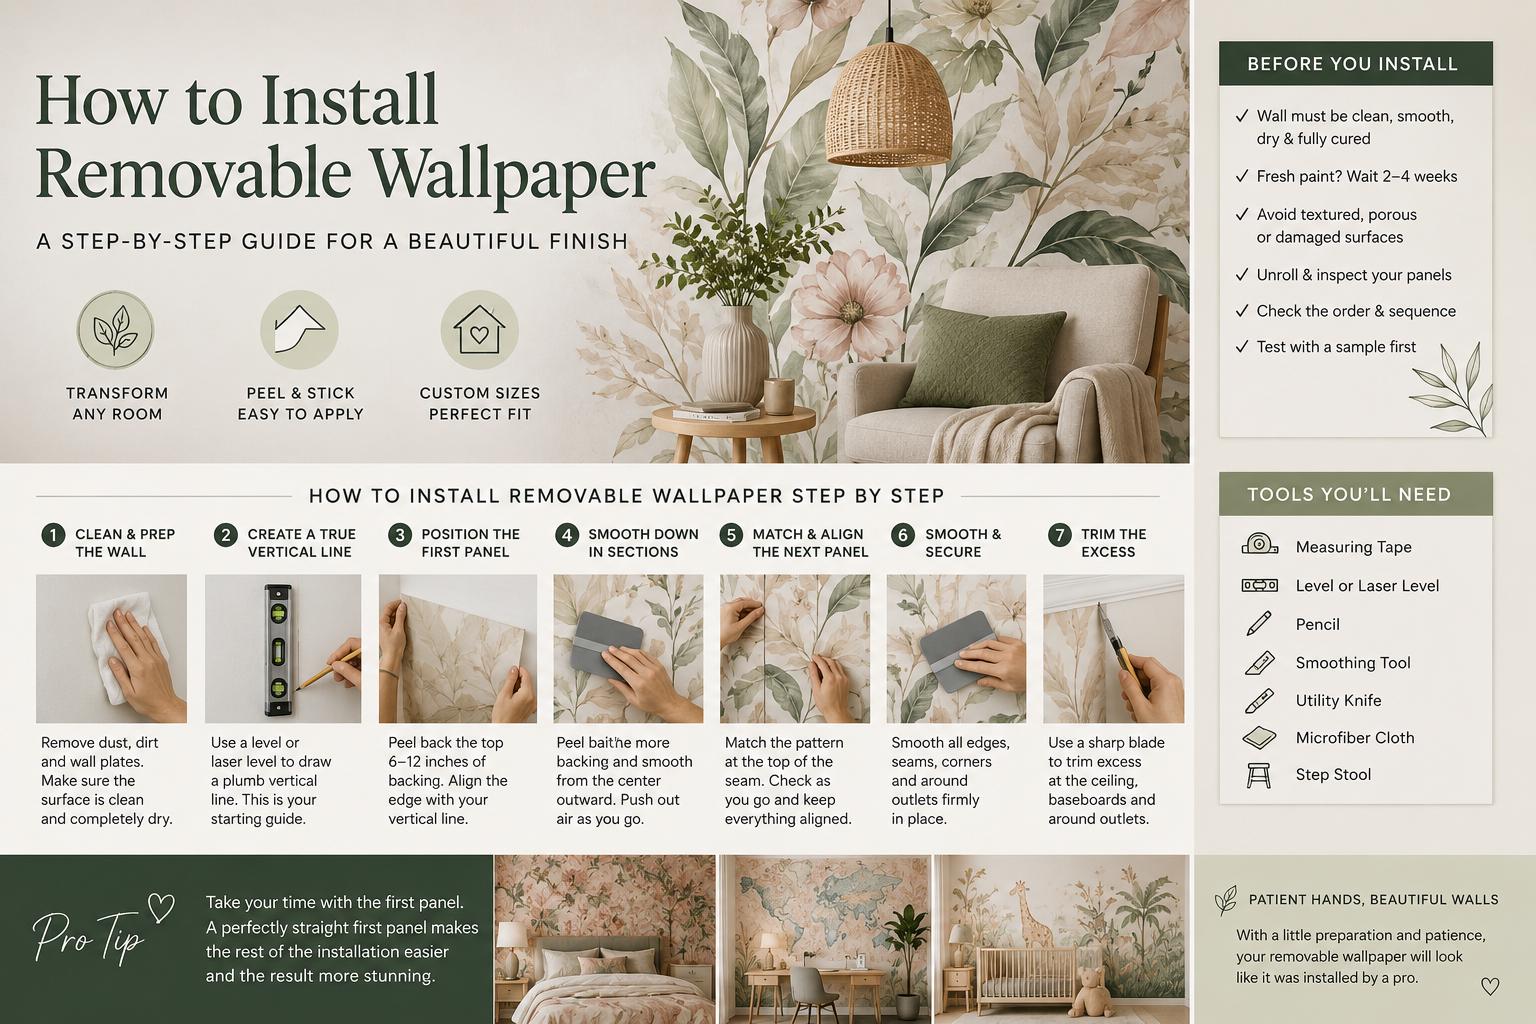
A dramatic botanical wall, a custom city map, or a playful nursery mural can change the feeling of a room in an afternoon. Learning how to install removable wallpaper is less about having professional experience and more about slowing down for the first panel. Get that panel straight on a clean, smooth wall, and the rest of the project becomes far more manageable.Peel-and-stick wallpaper is designed to make a high-impact update feel approachable. Still, the material is not magic: wall prep, accurate measuring, and patient alignment determine whether the finished wall looks tailored or rushed. Set aside uninterrupted time, especially for a large mural or a full accent wall, and give yourself enough floor space to organize the panels before you begin.
Before You Install: Check the Wall and Your Order
Removable wallpaper adheres best to smooth, clean, dry, properly cured painted walls. A freshly painted wall may look ready, but paint can release moisture and gases while it cures, which can interfere with adhesion. Follow your paint manufacturer's cure-time guidance before installation. In many cases, that means waiting several weeks rather than a few days.Textured walls, heavily porous surfaces, peeling paint, and walls with loose drywall seams can create challenges. A light orange-peel texture may work with some designs, but it can show through and reduce contact with the adhesive. Deep texture, unprimed drywall, brick, and damaged surfaces are not ideal for a peel-and-stick application. If there is any uncertainty about color, finish, or adhesion, ordering a sample first is the practical choice. It lets you see the scale and color in your room's real light while testing the material on the intended surface.Unroll and inspect your wallpaper before removing any backing. Made-to-order panels are typically labeled or sequenced so the design flows correctly from left to right. Lay them on a clean floor in order and look at the full image. This matters most for large-scale florals, scenic murals, maps, and personalized designs, where placing a panel out of sequence can interrupt the composition.You will want a clean microfiber cloth, a measuring tape, a pencil, a level or laser level, a flexible smoothing tool, a sharp utility knife, and a sturdy step stool. Keep a clean work surface nearby for your backing paper and trimming scraps. A second person is especially helpful with tall panels, but one person can install a smaller accent wall by working slowly.
How to Install Removable Wallpaper Step by Step
Clean the surface and clear the workspace
Remove outlet covers, switch plates, wall hooks, and anything else that interrupts the wall surface. Wipe the wall with a clean, lightly damp microfiber cloth to remove dust. If you use a gentle cleaner, remove all residue and allow the wall to dry fully before installation. Adhesive needs direct contact with the painted surface, not a layer of dust, oil, or cleaner.Move furniture away from the wall and check your lighting. Strong side lighting can make it easier to spot bubbles and seams as you work. Turn off power at the breaker before removing electrical plates or cutting around outlets.
Create a true vertical starting line
Walls, ceilings, door frames, and baseboards are not always perfectly level. Do not assume the corner is straight enough to guide your first panel. Instead, measure the width of the first panel and mark a vertical plumb line slightly in from the starting edge. Use a level or laser level to make the line truly vertical.This line is your installation anchor. If the first panel drifts even slightly, every panel after it can drift with it. A tiny gap or trim adjustment at an outer edge is usually less noticeable than a design that leans across the entire wall.
Position the first panel before committing
Place the first panel face-down on a clean surface. Peel back about 6 to 12 inches of the backing paper at the top, then crease the backing lightly so it stays out of the way. Avoid pulling off the entire backing at once. A fully exposed panel can fold onto itself, collect debris, or become difficult to control.With the design facing you, hold the top of the panel against the wall and align its edge with your vertical guideline. Leave a little extra material at the ceiling and side edge for trimming later. Once the top is level and the panel is in the right position, press the exposed adhesive gently into place from the center outward.Do not press hard until you have checked the alignment. Peel-and-stick material can often be lifted and repositioned carefully during installation, but repeated pulling can make the process harder, particularly on delicate paint finishes.
Smooth downward in small sections
Work in a steady rhythm: peel back another 6 to 12 inches of backing, then smooth the wallpaper from the center toward the outer edges. This pushes air out as you go instead of trapping it beneath a large section of material. Use your smoothing tool with firm, even pressure, but do not scrape aggressively.If a bubble appears, stop and lift the nearest edge of the panel back to the bubble. Reapply that area gradually while smoothing outward. Trying to force a large bubble toward the edge after the panel is fully installed can stretch the material or leave a crease. Small bubbles may settle with gentle smoothing, but it is best to correct noticeable ones while the adhesive is still easy to reposition.
Match each new panel to the design, not the wall edge
For the second panel and beyond, start at the top and match the printed pattern where the panels meet. Depending on the design and production format, panels may overlap slightly or meet edge to edge. Follow the instructions that came with your order rather than guessing. The pattern match is the priority, even if the ceiling line has a slight variation.Peel back only the upper portion of the new panel, align the design at the seam, and step back before pressing it down. Check a few feet below the top as well. A seam can look right at eye level but drift farther down if the panel is not hanging straight. Once you are satisfied, continue smoothing downward in short sections.Avoid stretching the wallpaper to make a pattern meet. Stretching can distort artwork, create tension at the seam, and cause the material to pull back later. If the match is off, gently lift and realign the panel while you still can.
Trim only after the panel is fully secured
When a panel is smooth and aligned, press it firmly into the ceiling line, baseboard, corners, and around trim with the smoothing tool. Use a sharp utility knife and a fresh blade to trim excess material. Dull blades can tug, tear, or leave a ragged edge, especially around detailed cuts.For outlets and switches, smooth the wallpaper over the opening first, then make a small X-shaped cut in the center. Trim outward carefully until the opening is clear. Reinstall the cover plate after the wallpaper is secured. The plate will hide tiny imperfections around the cut edge.
Common Installation Mistakes and Easy Fixes
The most common issue is beginning in a corner without a plumb line. If you catch a drifting first panel early, lift it slowly and reset it. If several panels are already installed, avoid trying to force later seams into alignment. It is often better to preserve the design match and make a small trim adjustment at the far edge of the wall.Another frequent mistake is installing over a wall that is dusty, newly painted, or textured beyond what the material can accommodate. Wallpaper may lift at the edges in these situations, and pressing harder rarely solves the underlying problem. Clean preparation is more effective than extra pressure.Rushing the backing removal also causes wrinkles. Keep only a small amount of adhesive exposed, and pause when you need to check the pattern. For large murals, having one person hold the panel while another checks the seam can prevent a costly reset.Finally, do not trim too early. Extra material at the ceiling, floor, and side edges gives you room to adjust panels for a clean pattern match. A precise final trim is what makes a DIY installation feel polished.
Plan for a Finish That Feels Designed
Once the wallpaper is up, take a few minutes to inspect seams and edges in daylight and with the room lights on. Press any loose areas gently with a clean smoothing tool, then return furniture and wall plates. Let the new wall be the focal point: a velvet headboard can deepen the mood of a floral bedroom, while simple furniture helps a personalized map mural stand out in a home office or rental entry.For a project that feels especially personal, custom sizing is worth confirming before you order. Measure the full width and height of the wall, account for sloped ceilings or openings, and consider whether the design should sit behind furniture or remain fully visible. WallpaperCraftWorks creates made-to-order designs for exactly this kind of intentional room refresh, so measuring carefully before production helps the finished wall feel like it belongs there.The best installation is not the fastest one. Give the first panel your full attention, keep the design aligned as you go, and let the final trim do its quiet work. That patience is what turns a removable wallcovering into a room people remember.