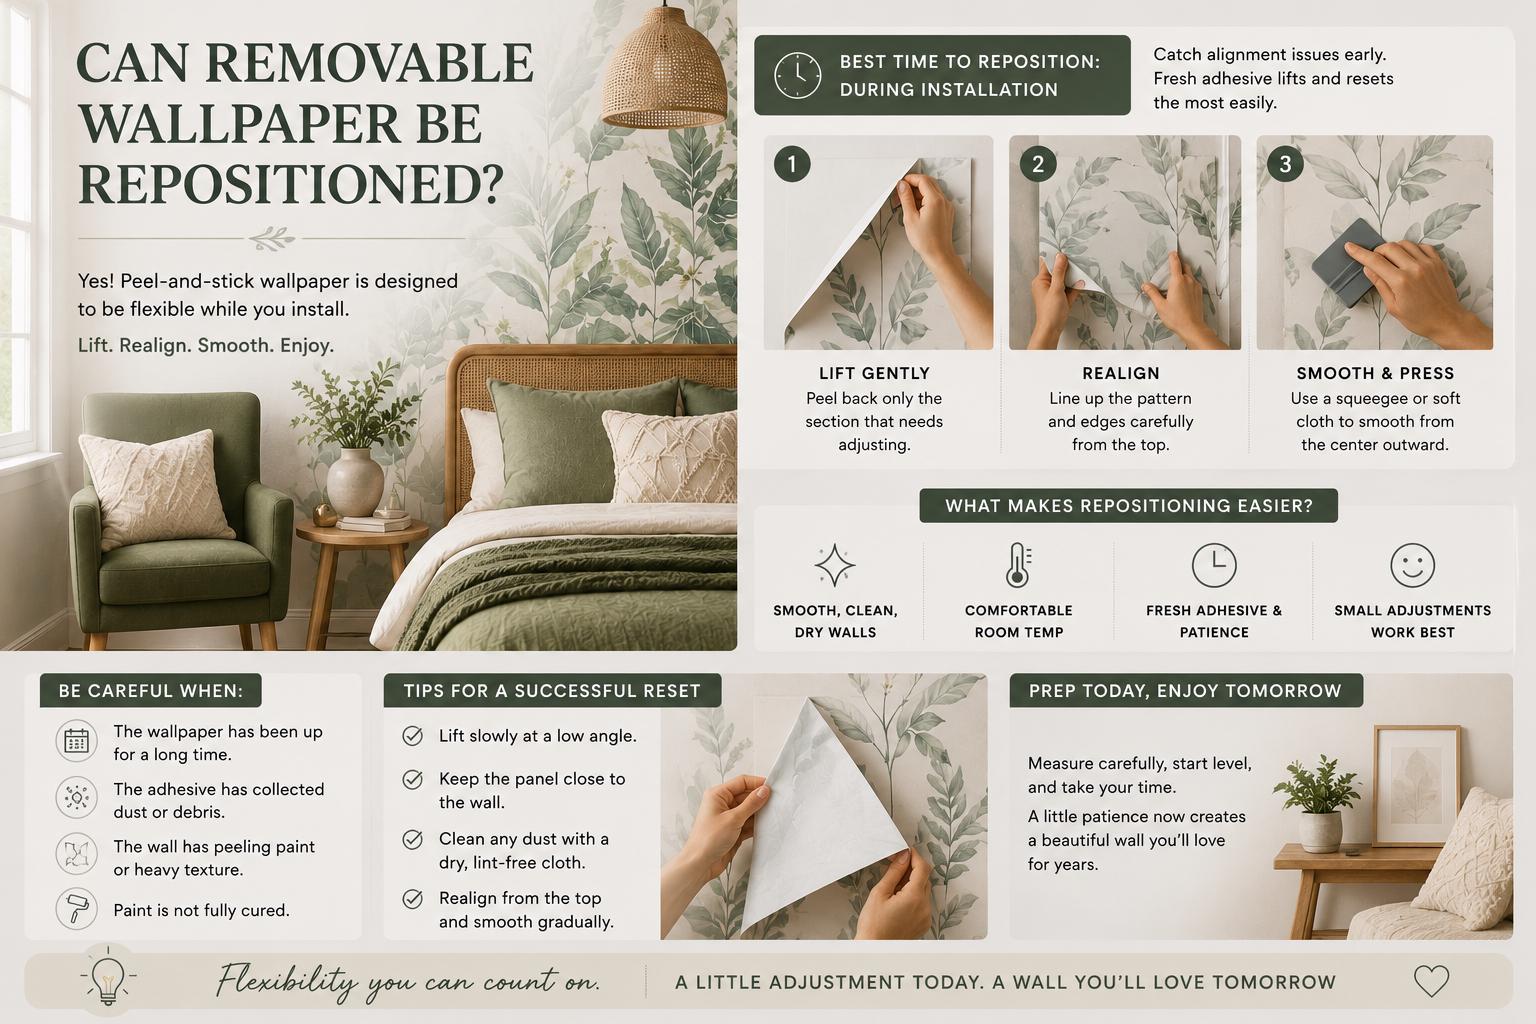
panel that lands slightly crooked can make an otherwise beautiful accent wall feel like a problem. So, can removable wallpaper be repositioned? Usually, yes. Peel-and-stick wallpaper is designed to give DIY decorators room to lift, realign, and continue - especially during installation - but the result depends on your wall surface, the condition of the adhesive, and how carefully you handle the material.That flexibility is one reason removable wallpaper works so well for renters, first-time DIYers, and anyone ready to make a bold design choice without a permanent renovation. Still, repositionable does not mean indestructible. Knowing when to lift a panel and when to leave it alone helps protect both your wall and your finished look.
Can Removable Wallpaper Be Repositioned During Installation?
Yes, this is the best time to do it. If you notice the first panel is not perfectly plumb, the pattern match is drifting, or a bubble is forming near the top, gently peel back only the section that needs correcting. Then smooth it down again with a wallpaper squeegee or a soft, clean cloth, working from the center outward.Avoid pulling a full panel off the wall just because one small area needs attention. Peeling back more material than necessary can make a large sheet harder to control, especially with oversized murals, detailed botanical repeats, or personalized designs. Small corrections are easier, cleaner, and less likely to create new wrinkles.The first panel deserves extra patience because it sets the alignment for every panel after it. Use a level or plumb line before exposing much of the backing paper. Start at the top, check the vertical line, and work down gradually rather than removing all the backing at once. A few additional minutes here can prevent a wall full of difficult adjustments later.
When Repositioning Works Best
Freshly installed wallpaper is generally the easiest to lift and reset. The adhesive has not had much time to settle, and the material is still clean, smooth, and easy to guide into place. If you catch an alignment issue right away, gently lift the edge at a low angle and pull slowly rather than tugging straight out from the wall.Repositioning also works best on a properly prepared surface. Smooth, clean, dry walls give peel-and-stick wallpaper the even contact it needs. Painted drywall with a satin, eggshell, or similar smooth finish is usually far more cooperative than heavily textured walls, dusty surfaces, or walls with peeling paint.Room conditions matter, too. A comfortably temperate room is ideal. Very cold material can feel stiff, while excessive heat may make the adhesive more aggressive and the panel more difficult to manage. If your wallpaper arrived rolled, allow it to rest flat in the room before installation so it can relax and become easier to position.
When You Should Be More Careful
Removable wallpaper can often be repositioned after it has been on the wall for a while, but it is not always the right move. Adhesive becomes more settled over time, and repeatedly lifting a panel can introduce dust, fibers, or tiny bits of paint to the backing. Once that happens, the panel may not adhere as evenly when you press it back into place.Be particularly cautious if the wallpaper has been installed for weeks or months. If an edge is lifting, it may be better to press it down firmly after checking for dust behind it than to remove the entire panel. If you need to access an outlet cover, repair a small area, or correct a visible overlap, work slowly and only lift the minimum section required.Walls with fresh paint need patience, too. Even if paint feels dry to the touch, it needs time to fully cure. Applying peel-and-stick wallpaper too soon can affect adhesion and may increase the chance of paint lifting when the material is removed or repositioned. Follow your paint manufacturer's curing guidance before installation, especially with newly painted feature walls.
How to Reposition a Panel Without Creating New Problems
Start by washing your hands. This simple step helps prevent oils, lotion, or dirt from transferring to the adhesive. Have a squeegee, level, and a clean microfiber cloth nearby before lifting the panel so you are not holding a loose section while searching for tools.Begin at the top corner or the closest accessible edge. Lift gently and steadily, keeping the wallpaper close to the wall as you peel. A low, controlled angle places less strain on the material than a fast pull straight outward. For a large panel, having a second person hold the lower portion can make the difference between a quick correction and a frustrating tangle.Once lifted, inspect the adhesive backing and wall. If you see dust or debris, remove it carefully with a dry, lint-free cloth. Do not add water, cleaning spray, or extra glue to the adhesive. Then realign the panel from the top, checking both the edge and the pattern before pressing down. Smooth a few inches at a time to release trapped air as you go.If a bubble appears, do not panic or immediately remove the entire panel. First, try pushing the air toward the nearest edge with a squeegee. For a stubborn bubble near the center, carefully lift just enough wallpaper to release it, then smooth the area back down. Slow, deliberate adjustments preserve the polished finish you wanted in the first place.
Surface Preparation Makes Repositioning Easier
The best repositioning strategy begins before the wallpaper ever touches the wall. Clean the installation area with a gentle, residue-free method and let it dry completely. Dust, grease, pet hair, and leftover cleaning product can interfere with adhesion and make a panel lift unevenly later.Texture is the other major factor. Peel-and-stick wallpaper is made for smooth walls. Heavy orange peel, knockdown texture, brick, unfinished wood, and uneven plaster can prevent the adhesive from making consistent contact. On those surfaces, a panel may look secure at first but become difficult to adjust cleanly or fail to stay flat along the texture.If you are unsure about paint color, material finish, or wall compatibility, order a sample before committing to a custom-sized order. A sample lets you see the design in your actual light, feel the material, and test placement on the intended wall. It is a small step that can bring real confidence to a nursery mural, dramatic entryway, or custom home office backdrop.
Design Details That Make Alignment Matter
Some designs are forgiving. Scattered florals, loose watercolor shapes, and organic safari scenes can disguise a tiny variation more easily than a geometric print. Others require closer attention. Stripes, grids, architectural motifs, and patterns with strong vertical lines make even a slight shift more noticeable.Personalized murals also benefit from a careful first placement. Names, quotes, city maps, and initials are designed to feel intentional, so take time to confirm the focal point before pressing down the panel. Consider furniture height, crib placement, headboards, desks, and sightlines from the doorway. The goal is not simply to get the wallpaper on the wall, but to make the room feel considered from every angle.For full-wall murals, lay panels out in order before beginning. Confirm the sequence, identify the top edge, and make sure the artwork flows as expected. This reduces the chance of lifting a panel later because two sections were installed out of order.
How Many Times Can You Reposition Removable Wallpaper?
There is no exact number because every installation is different. A panel may handle one or two careful adjustments beautifully, while repeated lifting can weaken adhesion or stretch the material. Treat repositioning as a useful correction tool, not something to rely on throughout the entire project.If you find yourself lifting the same panel repeatedly, pause. Check whether the wall is level, whether you began with a true plumb line, and whether the panel is being pulled taut as you apply it. Trying to force a pattern match by stretching the wallpaper can create a distorted design and make the lower edge increasingly difficult to align.Made-to-order wallpaper is created for your chosen dimensions, so measuring accurately matters before you place an order. Add a little room for trimming, account for obstacles such as windows or built-ins, and double-check height and width. Careful measuring, a smooth wall, and a patient first panel give your design the best chance to look professionally finished.A removable wallpaper wall does not have to be a high-stakes commitment. Give yourself a calm installation window, work slowly, and make adjustments while the panel is still fresh. That little bit of flexibility is what makes it possible to bring a dramatic floral, dreamy celestial scene, or personalized mural home with confidence.